Here is a complete laser marking problems and solutions to help operators better understand and deal with various possible problems. From hardware problems to software settings, we will cover a wide range of topics and present you with a series of detailed troubleshooting methods. Whether you are new to marking lasers or have extensive experience in the field, this article will provide you with valuable knowledge to take on the challenges you face.
With the guidance of laser engraving troubleshooting, you will be able to solve the problems and ensure the stable operation of the production line, and improve the quality and efficiency of product marking.
9 Common Problems of Laser Marking Machines
Why is My Laser Engraver Not Burning?
1. Press the test button on the control panel and observe the ammeter status:
a. No current: Check if the laser power supply is turned on, if the high-voltage line is loose or disconnected, and if the signal line is loose.
b. Current present: Check for broken lenses or significant misalignment in the optical path.
2. Check if the water cooling system is functioning properly:
a. No water flow: Check if the water pump is damaged or not powered.
b. Water flowing: Check if the water inlet and outlet are connected correctly or if water hoses are damaged.
3. Verify the laser power setting:
Gradually increase the test power to ensure it is set to the appropriate level for your material.
4. Replace the laser power or control board for testing purposes.
Decreased Laser and Laser Marking Machine Is Not Clear Enough
2.1 Laser source aging, damage, or unstable power may lead to decreased laser intensity. Replace the laser source or perform maintenance and calibration on the laser device.
2.2 Optical components such as lenses and mirrors in the optical system may become contaminated, misaligned, or damaged, affecting light transmission and focusing, resulting in unclear marking. Inspect and clean optical elements to ensure they are in optimal condition.
2.3 Incorrect focal position in the laser marking machine can result in unclear marking. Ensure accurate adjustment of the focal position to achieve the best marking effect.
2.4 Incorrect marking parameter settings may lead to unclear marking. Adjust marking parameters such as power, speed, and frequency according to material and process requirements.
2.5 Characteristics of the materials (such as reflectivity, absorbance, etc.) can influence laser absorption and propagation, affecting marking clarity. Adjust marking parameters based on the material characteristics of the workpiece.
2.6 Clean the laser tube, especially when contaminants are present. Wipe off dust from laser lenses. If issues persist after cleaning, it may be necessary to replace the laser head. Ensure a clean working environment and perform regular equipment cleaning.
The Engraving is Not Deep Enough or Uneven Depth
3.1 If the laser power is insufficient, it may result in inadequate engraving depth. Ensure that the laser source’s power setting is correct and adjust as needed.
3.2 Adjust the focus size to ensure proper laser beam focusing on the workpiece surface.
3.3 Optical lenses impact the focusing and transmission of light. Inspect and clean optical components to ensure they are in good condition.
3.4 Machine alignment is not correct: Adjust the galvanometer mirrors, field lens, and processing table.
3.5 Characteristics of the workpiece surface may influence laser absorption and propagation, affecting engraving depth. For different materials, it may be necessary to adjust engraving parameters to accommodate surface properties.
3.6 Excessively fast engraving speed may lead to insufficient engraving depth due to inadequate interaction time between the laser and the material. Slow down the engraving speed to ensure sufficient laser-material interaction.

Laser Beam Weak
4.1 The laser source of the laser marking machine may encounter issues, such as laser aging, damage, or unstable power. Solutions may involve replacing the laser source or performing maintenance and calibration on the laser.
4.2 Components in the optical system, such as lenses and mirrors, can be affected by contamination, misalignment, or damage, which can impact light transmission and focusing. Solutions include inspecting and cleaning optical elements to ensure they are in optimal condition.
4.3 Laser marking machines often feature power adjustment functions, and setting the power too low can result in weak output. Ensure the correct power setting and appropriately adjust power parameters.
4.4 If the laser is transmitted to the marking head via optical fiber, the quality and connection of the fiber itself can affect output intensity. Check the tightness of fiber connections to ensure transmission quality.
4.5 If a beam splitter is used in the laser system, verify its correct alignment to avoid light losses caused by splitting.
4.6 Ensure stable power supply for both the laser source and the marking machine to prevent power instability due to power supply issues.
Incorrect Focus of the Laser Marking Machine
Laser marking machine focal shift refers to the situation where the laser beam fails to accurately focus on the target object during the marking process, resulting in a displacement of the marking effect.
5.1 Incorrect Laser Head Position Adjustment: Readjust the position of the laser head to ensure that the laser beam accurately focuses on the work platform.
5.2 Optical Component Malfunction: Inspect whether optical components are damaged or require cleaning. If necessary, replace or clean them promptly.
5.3 Improper Laser Power Adjustment: Adjust the laser power to ensure that the energy of the laser beam matches the current marking requirements.
5.4 Irregular Material Surface: Before marking, inspect the surface of the target object for evenness. If needed, perform surface treatment or adjust the focal length to adapt to an uneven surface.
5.5 Use of an Autofocus System: Some laser marking machines may be equipped with an autofocus system that automatically adjusts the focal point position based on the height of the workpiece, reducing issues with focus shift.

Laser Marking Machine Laser Output Spot Flickering
6.1 Check the precise adjustment of the resonator cavity.
6.2 Ensure the secure fixation of the membrane holder.
6.3 Examine whether there are any issues with the fixation of the focusing cavity.
6.4 Verify the appropriate tightness of the YAG crystal fixation.
Engraving Dislocation
7.1 Check if all screws on the machine are tightened. If loose, use a screwdriver to tighten them.
7.2 Evaluate the alignment of the laser beam. It should be perpendicular to the surface of the material you are engraving.
7.3 Inspect the focusing lens. Clean the lens to ensure there is no dirt or debris.
Uneven Edges
8.1 Adjust Marking Parameters: Based on the material’s characteristics and requirements, adjust parameters such as laser power, marking speed, and scanning repetitions to achieve smoother edge effects to achieve a consistent marking depth and edge quality.
8.2 Re-adjust Marking Head Position: Ensure the marking head is correctly installed and adjusted, allowing the laser beam to accurately focus on the marking surface.
8.3 Use Cooling Equipment: For materials susceptible to thermal effects, consider using additional cooling equipment to lower material temperature and reduce uneven edges.
8.4 Treat Material Surface: Ensure the material surface is clean and smooth. If necessary, perform appropriate pre-treatment.
8.5 Regularly cleaning and maintaining the optical components of the laser system will prevent residue buildup and ensure optimal engraving performance.
8.6 Mechanical Calibration: Regularly calibrate and maintain the mechanical components of the laser marking system, such as mirrors, lenses, and the galvanometer system. Misalignment or wear can lead to uneven marking.
Laser Engraver Moving but Not Engraving
If your laser engraver is moving but not engraving, it indicates that there is an issue with the laser marking process.
9.1 Check Laser Power: Ensure that the laser power is set correctly. If the laser power is too low, it might not be sufficient to engrave the material. Adjust the laser power settings according to the material you are engraving.
9.2 Focus Alignment: Verify that the laser beam is properly focused on the material’s surface. Incorrect focus alignment can result in weak or non-existent engraving. Adjust the focal length or perform an autofocus procedure if your laser system supports it.
9.3 Laser Tube Health: If you are using a CO2 laser engraver, inspect the laser tube’s condition. An aging or failing laser tube might lead to reduced engraving power. Consider checking the tube’s output power and lifespan.
9.4 Software Settings: Double-check the engraving settings in your laser engraving software. Ensure that the correct file is loaded, and the engraving settings (speed, power, hatch pattern, etc.) are properly configured.
9.5 Connection and Communication: Verify that there is a stable connection between your computer and the laser engraver. Make sure that the engraving job is being sent and received correctly by the engraver’s control system.
9.6 Software and Firmware Updates: Ensure that your laser engraver’s software and firmware are up to date. Sometimes, issues can be resolved by updating to the latest versions.

Tips for Laser Engraver Maintenance
Galvo Lens: Avoid contact with strong magnetic fields, high voltage, and strong vibrations. Do not touch the galvanometer mirrors with your hands. Clean the mirrors with a cloth and a small amount of alcohol.
Focus Alignment: Regularly check and adjust the focus alignment to ensure accurate and consistent engraving results. Use calibration tools provided by the manufacturer.
Laser Source: Regularly clean the laser source and circuit boards inside the machine cabinet and clean the laser cooling system.
Check Grounding and Power Cables: Ensure that equipment grounding and power cable connections are secure to prevent electrical leakage accidents.
Lubrication and Inspection: Apply lubricating oil to moving parts such as the lifting mechanism and rails. Regularly inspect the operation of cooling equipment.
Pre-Use Checks: Before use, verify that software settings, function buttons, and indicator lights are functioning properly.
Regular Cleaning: Keep the machine clean by regularly wiping down surfaces, removing dust, debris, and residue. Use a soft, lint-free cloth to clean mirrors, lenses, and other optical components.
Weekly Water Circulation and Temperature Control: Clean and replace circulating water and clean the water tank weekly. It is recommended to use purified or distilled water and control the water temperature below 35°C to extend the lifespan of the laser tube.
Environment: Maintain a clean and controlled working environment. Avoid excessive dust, humidity, and temperature fluctuations that could affect machine performance.
Get Better Laser Marking Effect
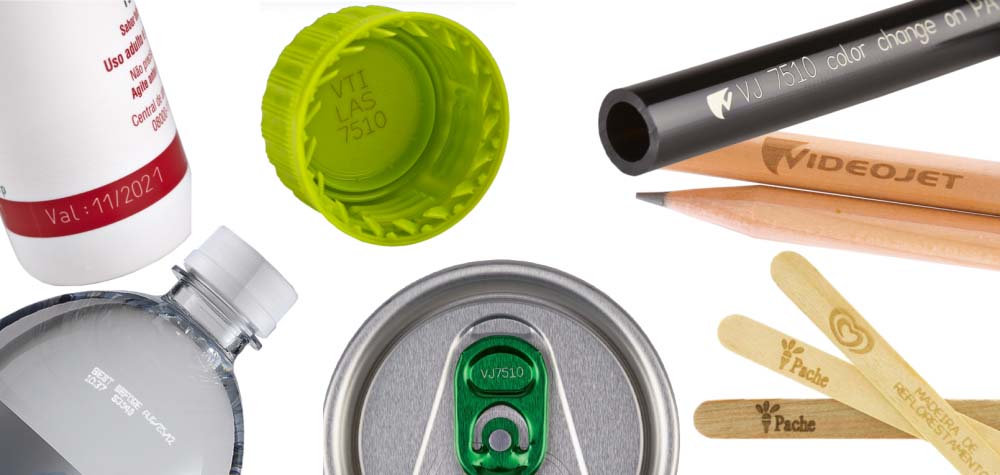
Choosing the right material is crucial: Some materials (such as wood and fabric) are challenging to engrave due to their porous nature. Adjust the laser beam’s speed and power to generate different effects. By experimenting with these machine settings, you can find the perfect combination that suits your material and engraving requirements.
Optimize Laser Settings:
Adjust Power: Optimize the laser power to achieve the desired marking depth without causing excessive heat or burning.
Control Marking Speed: Modify the marking speed to control the dwell time of the laser on the material. Slower speeds can lead to darker and deeper marks.
Frequency and Pulse Duration: Adjust the laser frequency and pulse duration to control the energy delivered to the material. Fine-tuning these parameters can impact the marking quality.
Focus Alignment: Ensure precise focus alignment of the laser beam on the material’s surface. Proper focus improves the sharpness and clarity of the marking.
Calibrate Regularly: Calibrate the laser system periodically to maintain accuracy and consistency in marking quality.
Professional Training: Properly train operators on how to use the laser marking machine, settings, and maintenance procedures for consistent and high-quality marking results.
If you’ve tried the above steps and the issue persists, consider reaching out to the manufacturer’s support or consulting a technical expert for further assistance.

The professional laser marking equipment manufacturer DPLASER, offers tutorial videos on YouTube channel for laser marking machine users. By these laser marking machine tutorial, you can access more information about laser marking machine technology, operating examples, machine troubleshooting, software usage, and more.
By delving into the working principles, operating procedures, parameter settings and adjustments of the laser marking machine, as well as exploring common application cases and techniques, you can gain a deeper understanding of the machine. This will enhance your skills in practical operations and allow you to apply this knowledge in your production and manufacturing.
That all, the above introduction of laser engraving problems and solutions, can it solve the problems you encountered? Have you encountered any other problems in the process of using Laser Marking System? If you have a problem that cannot be solved by the machine, you can also leave a message below, we are willing to discuss any laser equipment problems with you.