With the rising demand for personalized creations, laser cutters have become an essential tool for crafting unique gifts, home décor, and artistic pieces. These machines can work with a variety of non-metal materials, enabling DIY enthusiasts to transform intricate designs into reality with precision and ease. Laser cutter machine for school bring new energy to classroom learning by offering hands-on experiences that foster creativity and innovation. Whether in schools or home workshops, they are empowering makers and hobbyists alike to turn imaginative ideas into tangible works of art—driving a wave of innovation across both the education and DIY sectors.
Why Choose a Laser Cutter for Education?
Applications in the Education Sector
Laser cutting and engraving machines are reshaping traditional teaching methods. These versatile tools are invaluable in the classroom, supporting a wide range of projects—from model woodworking and art design to prototype development and textile cutting.
Creativity in Education
Incorporating laser cutters into school projects makes learning more engaging and interactive. Students gain hands-on experience, helping them grasp abstract concepts through tangible results. Young learners can design and build their own creations, cultivating creativity and critical thinking from an early age.
Product and Mechanical Design
Engineering students use laser cutters to build detailed prototypes and models, strengthening their practical understanding of design principles and enhancing their problem-solving skills.
Fashion Design and Pattern Cutting
Fashion programs benefit from laser cutters’ ability to produce intricate patterns quickly and accurately, streamlining the creative process and improving precision in fabric design.
Empowering Cultural and Creative Industries
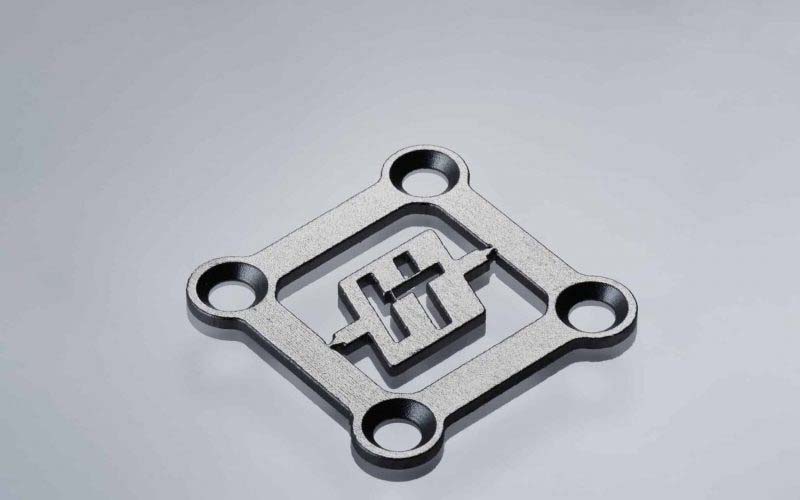
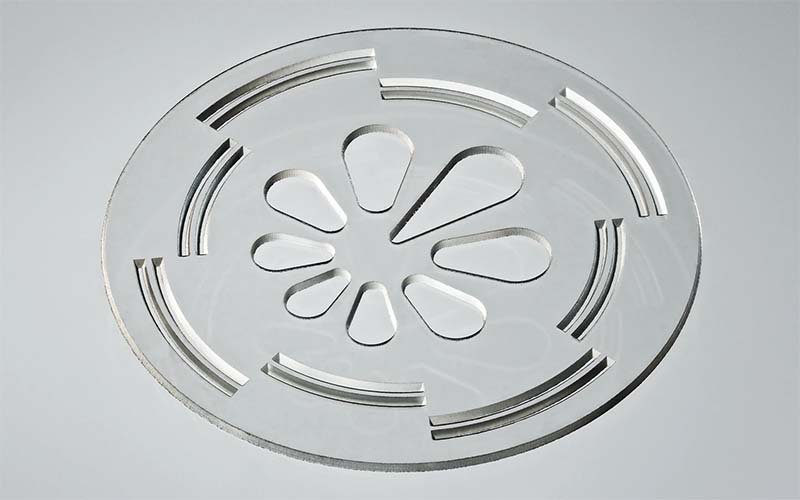
In cultural and creative industries, where aesthetics and precision are crucial, smart laser cutting and engraving machines provide accurate reproduction of complex patterns. Capable of working with wood, acrylic, leather, and more, these machines enable seamless transitions from design to production. From custom jewelry to unique decorative pieces, they help boost production efficiency and enhance brand competitiveness.
Applications in Model Making
Whether it’s for architectural models, film props, or finely detailed figurines, smart laser cutters are indispensable in model making thanks to their speed and precision.
- High-Precision Processing
Supports micron-level accuracy to meet the high standards of detail and quality required in model production.
- Multi-Material Compatibility
Suitable for wood, plastic, acrylic, and other materials, offering a broad creative canvas for designers and makers.
- Efficient Production
With high-speed cutting capabilities, laser machines significantly shorten production timelines, enabling rapid delivery of complex design projects.
Advantages of Laser Cutter in Education and Schools
Safety Design and Protective Features
Educational CO₂ laser cutters are specifically designed for student use, equipped with emergency stop buttons, laser protective covers, and safety interlock systems. These features ensure that the machine can quickly shut down in case of any abnormality, protecting users’ safety during operation.
Easy to Use
With a user-friendly interface, simple operation, and features like automatic focusing, laser cutters are ideal for STEAM education and creative projects. Basic operation can be learned in just a few minutes. However, mastering advanced functions, troubleshooting, and optimizing cutting results may take longer. Students are also encouraged to learn design software such as CAD and Corel DRAW to fully leverage the machine’s capabilities.
Environmental Friendliness
The best laser cutter for schools operates with low noise and is equipped with a fume extractor, effectively filtering smoke, odors, and dust to maintain clean indoor air, making it suitable for classroom environments.
High Performance and Stability
Built with high-quality components and subjected to strict quality control, educational laser cutters ensure high precision and stable performance. Their strong adaptability makes them suitable for various applications, from school projects to small-scale commercial production.
Deep Integration into Educational Settings
Laser cutters integrate seamlessly with creative curricula, breaking through traditional subject boundaries and stimulating students’ innovation and technical skills. They support processing a wide range of materials, including wood, plastics, acrylic, and even some metals, helping students achieve precise engraving and creation.
Smart and Convenient Operation
The laser cutter for education supports operation via a mobile app, making it easier for students to design and create freely. It also offers real-time monitoring and device alert functions, ensuring the efficient and safe execution of projects.
Innovative Design and Educational Resources
Specially designed 3D modeling resources using modular assembly simplify the design process, lower the learning curve, and inspire students’ creativity, making it easier for them to engage in hands-on innovation.
What is the Best Laser Cutter for School?
Safety System Design
When selecting a laser cutter, prioritize models that come with comprehensive safety features, such as emergency stop buttons, laser shields, automatic shutdown, and overload protection. These safety measures ensure students’ safety and reliability during operation.
User-Friendliness and Easy Learning Curve
The laser cutter should have an intuitive interface and a simple control system, ideally with a touchscreen or digital LCD display. This makes it easier for both teachers and students to get started quickly and reduces the learning curve for effective use in the classroom.
Wide Range of Applications
Choose a laser cutter that can process a variety of materials, such as wood, plastics, fabrics, glass, and even certain types of stone. This versatility helps meet the diverse needs of different subjects and projects, enriching the curriculum and expanding the range of creative possibilities.
Laser Cutter Power and Size
Select a laser cutter with appropriate power and processing area for educational settings. Typically, a CO₂ laser cutting machine with 40W~80W power will be sufficient for daily classroom activities. A processing platform size of around 600mm × 600mm is also ideal for handling common student projects.
Maintenance and After-Sales Service
Opt for a machine that is easy to maintain and clean, with reliable after-sales support and technical assistance. Regular maintenance—such as cleaning the lenses and checking the laser tube—will help extend the life of the equipment and reduce downtime due to malfunctions.
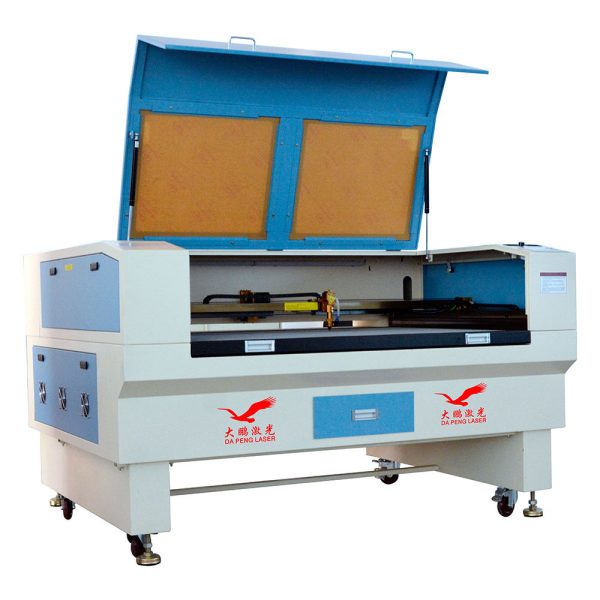
The Best CO₂ Laser Cutter for Schools
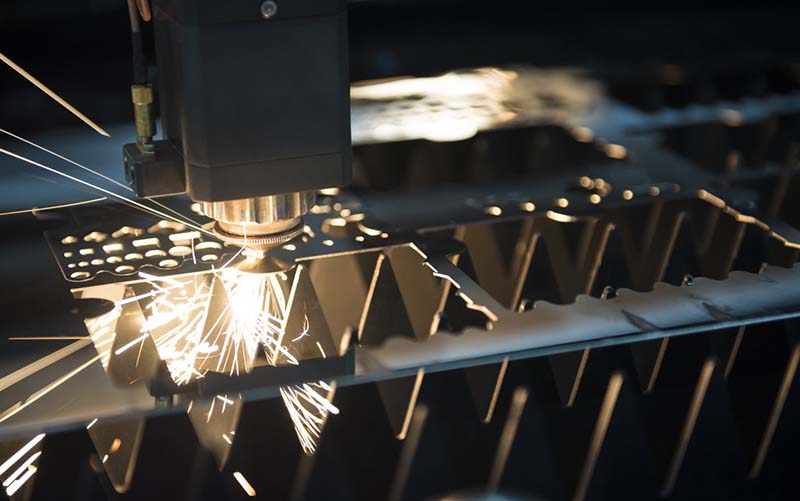
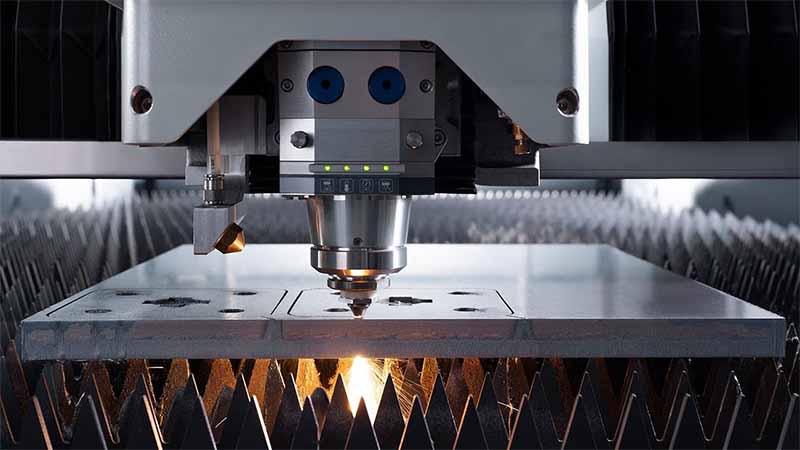
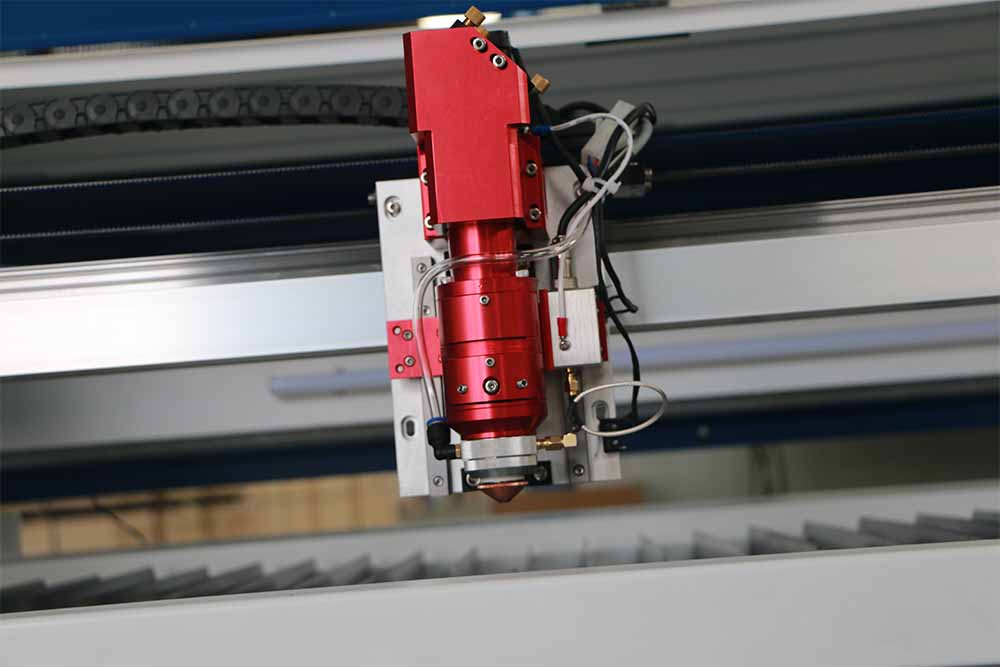
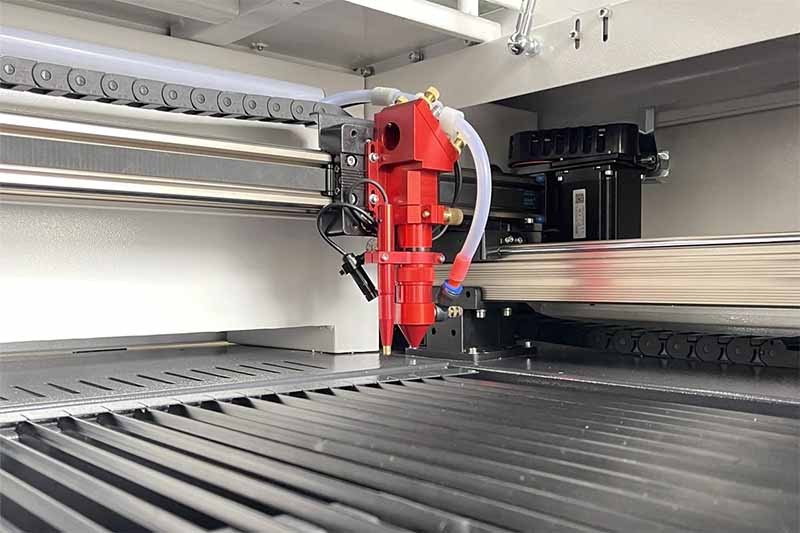
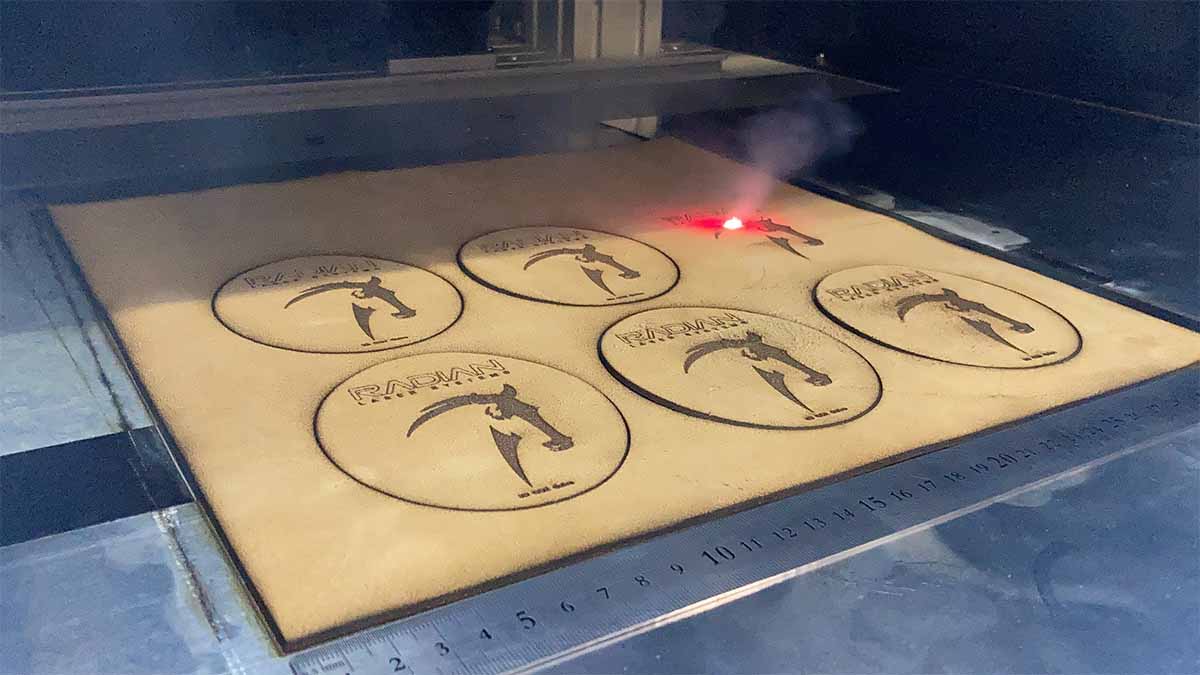
The CO₂ glass tube laser cutter comes with a complete safety system, including an emergency stop switch, lid protection, temperature alarms, and a sealed body design, ensuring comprehensive operational safety. The machine is equipped with a high-speed stepper motor, a large 60×60 cm working area, a 60W high-power laser tube, and an intelligent motherboard, offering excellent performance. It features a maximum engraving speed of 600mm/s and a cutting depth of up to 15mm, making it well-suited for processing a variety of non-metal materials.
The laser cutting system comes with a dedicated laser marking system and intuitive operation software, allowing for seamless integration of drawing, parameter setting, and laser processing. This greatly enhances usability and production efficiency, making it widely applicable across various fields such as education, cultural creativity, and manufacturing.
Features:
- Stepper Motor: Supports engraving speeds of up to 600mm/s, ensuring smooth operation and precise cuts to meet fine processing needs.
- Intelligent Motherboard: Integrates automatic control of exhaust, air blowing, and water cooling systems, along with energy-saving features to improve operational efficiency and safety.
- Honeycomb Platform: Effectively guides the laser beam through the material, reducing bottom reflection and ensuring high-quality cuts.
- Cooling Tank: Provides continuous cooling to the laser tube, maintaining stable power output and extending the machine’s lifespan.
- Air Pump System: Continuously blows air during cutting, preventing material overheating and combustion, which improves cut quality.
- Emergency Stop Switch: In case of an emergency, the stop switch can instantly cut off power, maximizing safety for both the operator and the equipment.
- User-Friendly Control: Equipped with a digital LCD control board and temperature display, making it easy to adjust laser power and cooling settings.
- Enhanced Environmental Design and Safety Features: Built-in air assist and exhaust systems ensure a clean working environment. Safety features include emergency stop, automatic shutdown, and a flame-resistant observation window, all meeting FDA standards and CE certification.
How to Use the Laser Engraver & Cutter for Education
1. Fix the Material
Place the material to be cut (such as wood, acrylic, leather, etc.) flat on the laser cutter’s working platform. Ensure that the material is securely positioned and fixed in place to prevent it from shifting or warping during processing.
2. Set Processing Parameters
Adjust the laser power, cutting speed, engraving depth, and air pressure settings in the control software based on the type and thickness of the material. This ensures optimal cutting or engraving results.
3. Adjust the Focus
Manually or automatically adjust the height of the laser head to ensure that the laser focus is precisely positioned on the material’s surface. Different material thicknesses require matching focal lengths to achieve smooth, clean cutting edges.
4. Check the Optical Path and Clean the Lenses
Regularly inspect the laser’s reflectors and focusing lenses to ensure they are free of dust or stains. If necessary, gently clean them with specialized lens paper to maintain optimal laser transmission and prevent reduced cutting power or focus deviation.
5. Import the Cutting File
Import the pre-designed cutting or engraving file into the laser cutting software. Check the dimensions, layout, and path sequence to ensure that the cutting area aligns correctly with the material placement.
6. Preview Positioning and Test Cut
Activate the red dot positioning feature (if available) to confirm that the cutting starting point and graphic range are correct. Conduct a small test cut in the corner of the material to check the cutting quality and edge smoothness. If the results are unsatisfactory, adjust the parameters accordingly.
7. Start the Cutting or Engraving Process
Once all settings have been confirmed, start the cutting or engraving program. During the process, monitor the machine’s operation to avoid issues like material burning, excessive smoke, or other abnormalities.
8. Complete the Process and Post-Processing
Once the cutting or engraving is finished, turn off the laser output, remove the finished piece, and clean up any leftover materials. If further post-processing (such as sanding, cleaning, or assembly) is needed, proceed based on the requirements of the project.
Finally, as the technology continues to evolve, the potential for educational and personal projects grows, making it easier than ever to transform ideas into reality. Whether you are a teacher looking to bring hands-on learning to your students or a DIY enthusiast eager to explore new creative possibilities, investing in the best laser engraver & cutter for education can open up endless opportunities for innovation.