Laser marking has become an essential process across industries such as electronics, automotive, medical devices, and metalworking—where precision, durability, and clarity are key. However, there is a lot to learn to achieve high quality laser marking results. In this article, we’ll explore high quality laser marking machine, how it works, the factors that affect marking quality, and how to fine-tune parameters are crucial for getting sharp, accurate, and lasting marks.

Features and Advantages of Laser Marking Machines
High Precision
Utilizing advanced laser technology, laser marking machines achieve micron-level precision. Whether marking text, patterns, or QR codes, the results are clear and sharp, meeting the demands of high-precision processing.
High Speed and Efficiency
Equipped with high-speed marking capabilities, these machines can complete large volumes of marking tasks in a short time. This greatly enhances production efficiency and shortens delivery cycles.
Long-lasting Durability
Laser marking is a non-contact process, avoiding the wear and tear of traditional mechanical engraving. The markings remain clear and legible over time, making it ideal for applications requiring long-term durability.
Versatile Functionality
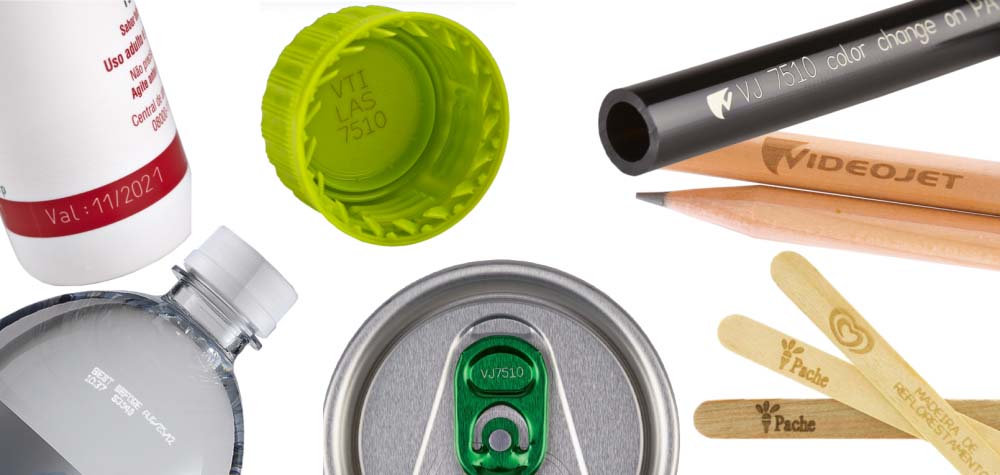
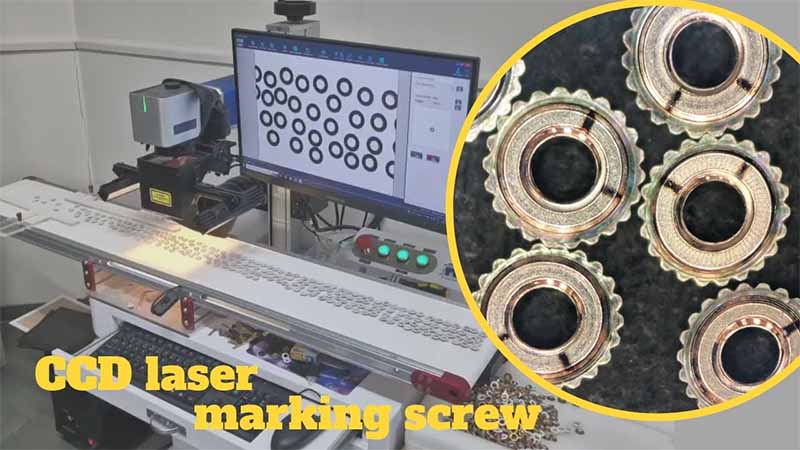
High quality laser marking machines support a wide range of content types, including text, graphics, QR codes, serial numbers, and production dates. When integrated with a flying marking system, they can perform continuous marking on production lines—widely used for beverage caps, wine bottles, battery products, and more.
Easy Operation
With a computer-controlled system and user-friendly interface, laser marking machines are simple to operate. Users can quickly get started with minimal training, without the need for specialized technical expertise—boosting operational efficiency while reducing labor costs.
How Does a Laser Marking Machine Work?
A laser marking machine works by focusing a high-energy laser beam into a very small spot to irradiate specific areas on the surface of a metal. This concentrated energy causes the temperature of the targeted area to rise rapidly, reaching the material’s melting point—or even boiling point—resulting in vaporization or ablation of the surface material.
By precisely controlling the laser’s energy density and exposure duration, the machine can remove material in a highly controlled and localized manner without physical contact. This process creates sharp, permanent, and high-resolution marks on the surface.
The effectiveness of laser marking depends not only on the machine’s capabilities—such as laser type, power, and beam quality—but also on the properties of the material being marked. Different metals vary in laser absorption, thermal conductivity, and melting points, which directly impact the clarity, depth, and efficiency of the marking process.

What Affects High Quality Laser Marking?
Achieving high-quality laser marking depends on a combination of factors related to laser settings, scanning behavior, material properties, and environmental conditions. Below are the key aspects that influence marking results:
1. Laser Parameters
Power Output: The laser’s intensity directly affects the marking outcome. Higher power can increase marking speed but may also cause excessive ablation or material damage if not properly controlled.
Pulse Duration: The length of each laser pulse impacts how the energy is delivered. Different materials and marking goals require specific pulse widths for optimal results.
Wavelength: Different materials absorb different wavelengths more efficiently. Selecting the appropriate laser wavelength ensures effective energy absorption and better marking quality.
Repetition Rate: The number of laser pulses per second (pulse frequency) affects both marking depth and speed. Higher repetition rates can improve throughput but may reduce energy per pulse.
2. Scanning Parameters
Scanning Speed: The speed at which the laser beam or marking head moves over the material affects marking clarity and depth. Too fast may result in faint or incomplete markings.
Spot Size (Focus Size): The diameter of the focused laser beam directly influences the resolution and precision of the mark. A smaller spot size allows for finer details and deeper engraving when needed.
3. Material Properties
Material Type: Different materials (e.g., metals, plastics, ceramics) absorb laser energy differently, which affects how well they can be marked.
Color and Texture: A material’s color and surface texture influence how it reflects or absorbs laser energy. Darker, matte surfaces typically absorb better than light or glossy ones.
Surface Condition: Smooth surfaces reflect more light, while rough or treated surfaces may absorb laser energy more efficiently, impacting mark contrast and quality.
4. Environmental Conditions
Temperature and Humidity: Ambient conditions can influence the performance of the laser and the thermal response of the material. Extreme temperatures or high humidity may degrade marking consistency.
Dust and Contaminants: Airborne dust or pollutants can interfere with the laser beam’s path or settle on the material surface, reducing marking quality or causing defects.
5. Type and Condition of the Laser Marking Equipment
Laser Type: Different types of lasers—such as fiber lasers, CO₂ lasers, and UV lasers—are suited to different materials and applications. Choosing the right laser source is critical for achieving optimal results.
Optics and Beam Path: Components like focusing lenses, protective windows, and beam alignment systems must be properly maintained and adjusted. Any misalignment or contamination can negatively impact focus precision and marking quality.
System Stability: The operational stability of the entire system plays a vital role. Vibrations, electrical interference, or mechanical issues can cause inconsistencies in marking or reduce accuracy.
6. Fixtures and Workpiece Holding
Ensuring Stability: Fixtures are essential for keeping the workpiece stable during the marking process. Any movement or vibration of the part can lead to misalignment, blurring, or inaccuracies in the marking.
Adaptability to Different Workpieces: High-quality fixtures should be flexible and adjustable to accommodate various shapes, sizes, and materials. Multi-functional clamps and modular fixtures help maintain precision when working with a wide range of components.
How to Achieve High Quality Laser Marking Machine?
In laser marking processes, different materials and marking requirements demand tailored parameter settings for optimal results.
- For softer or delicate materials, laser power should be reduced to avoid burning or damaging the surface.
- For fine or detailed marking, lowering the marking speed can help improve clarity and resolution.
- For deeper engraving, using a lower pulse frequency can enhance marking depth, making it suitable for deep-etch applications.
To achieve ideal marking quality, it’s important to optimize key laser parameters such as wavelength, power, and pulse duration. These parameters are typically preconfigured by the manufacturer when the laser machine is delivered and should be properly documented and retained.
Over time, adjustments can be made based on specific marking tasks or material requirements to continuously ensure the best marking performance.

How to Improve High Quality Laser Marking For Metal?
Achieving consistently high-quality laser marking on metal surfaces requires careful optimization of both hardware and software, along with stable environmental conditions.
1. Optimize Mechanical Structure
Ensure that the mechanical components of the laser marking machine—such as linear guides and lead screws—are high-precision and operate smoothly. Regularly inspect the straightness of guide rails and the pitch accuracy of lead screws, and replace worn or degraded components in time. For example, using precision ball screws can reduce transmission errors and improve overall marking accuracy.
2. Stabilize the Optical Path System
Maintain the alignment and stability of the laser beam. Use high-quality optical lenses and clean them regularly to prevent dust and debris from degrading beam quality. Employing high-flatness mirrors and focusing lenses ensures the beam is accurately focused on the material surface, enhancing the precision of the marking process.
3. Fine-Tune Software Parameters
Adjust parameters such as pulse width and repetition frequency within the control software. A shorter pulse width concentrates laser energy more effectively, improving marking precision. The right pulse frequency can be tailored to the characteristics of different metal materials for optimal results.
4. Control the Operating Environment
Maintain a consistent temperature and humidity level to minimize environmental impact on the equipment. Stable conditions help prevent thermal expansion, contraction, or changes in optical performance that could otherwise reduce marking accuracy.

How to Achieve Deep Engraving on Metal with a Laser Marking Machine?
1. Power
Increasing laser power enhances the energy of the laser beam, which in turn deepens the marking depth. Different metals have varying tolerance ranges for power. For instance, stainless steel typically requires a power range of 30–100W, while softer metals like aluminum alloys need lower power, and harder metals require higher power. The power should be adjusted based on the material’s hardness and thickness.
2. Focus Distance
Reducing the focus distance to the minimum ensures that the laser beam is precisely concentrated on the material surface, enabling deep marking.
3. Pulse Frequency
For pulsed lasers, lowering the frequency (typically within the 1–100 kHz range) extends the duration of each laser pulse, allowing the energy to focus more intensely. This helps achieve deeper engraving effects.
4. Pulse Parameters
Increasing the energy per pulse, reducing the pulse interval, or extending the pulse width can enhance the material’s processing depth. These adjustments provide more energy to the material, increasing engraving depth.
5. Marking Speed
Lowering the marking speed (recommended range: 500–1000 mm/s) allows the laser more time to act on each point, thus improving marking depth. However, too slow a speed can reduce efficiency, so it is important to balance depth and processing time.
6. Spot Size
A smaller spot size concentrates more energy, making deep engraving easier to achieve. Adjusting the spot size typically requires changing the focusing lens to one with a different focal length. However, an excessively small spot may result in uneven energy distribution, potentially affecting marking quality.
7. Fill Density
Increasing the fill density (i.e., reducing the line spacing, typically in the range of 0.02–0.1 mm) increases the number of laser passes over a given area, which helps deepen the engraving. However, excessively high density may lead to overheating or reduced efficiency.
8. Repetition Rate
Repeating the marking process multiple times at the same location can gradually increase the engraving depth. This is ideal for fine deep engraving tasks. It’s important to leave adequate intervals between markings to prevent overheating, deformation, or uneven surface burning.
A good laser marking machine, equipped with a high-quality laser source, ensures precise beam focus (e.g., a smaller M² value), which increases energy density in a smaller spot. This enhances deep marking capabilities by concentrating more energy on a smaller area.
How to Ensure the Laser Beam is Properly Focused on the Material Surface?
Proper focusing of the laser beam on the material surface is crucial for achieving precise and high-quality markings. Here are the key steps to ensure accurate focusing:
1. Determine the Focus Distance
The focus distance refers to the distance between the f-theta lens and the point where the laser beam converges. Ensuring the correct focus distance is fundamental to achieving precise marking.
2. Prepare the Material
Place the material on the laser marking machine’s worktable, ensuring it is flat and stable. Any instability or unevenness can affect the quality of the laser marking.
3. Use a Focusing Tool
Most laser marking machines come equipped with a focusing tool, such as a focus gauge or a focusing rod. These tools help set the correct distance between the laser head and the material surface.
4. Adjust Z-Axis Height
Depending on the machine type, adjust the height of the laser head or worktable to match the material surface with the correct focus distance. This is typically done via the machine control panel or dedicated software.
5. Check the Spot Size
Activate the laser and create a test mark or spot on scrap material to observe the spot size. The smallest and most concentrated spot indicates the correct focus.
6. Fine-Tune the Focus
If the spot size is not the smallest, fine-tune the laser head or worktable height. Retest the marking until the smallest spot is achieved, indicating the laser is properly focused.
7. Auto-Focus Functionality
Some advanced laser marking machines are equipped with an auto-focus feature that automatically adjusts the laser head to the correct focus distance using sensors. If your machine supports this feature, enable it and follow the on-screen instructions.
8. Use Focusing Software
Certain laser marking systems come with integrated focusing software that provides visual feedback or measurement data, helping users achieve accurate focus.
Different metals have varying characteristics, which can significantly influence the quality of laser marking. To address this challenge, it is essential to test and calibrate the laser settings for each specific marking task. This ensures optimal results, regardless of the material type.
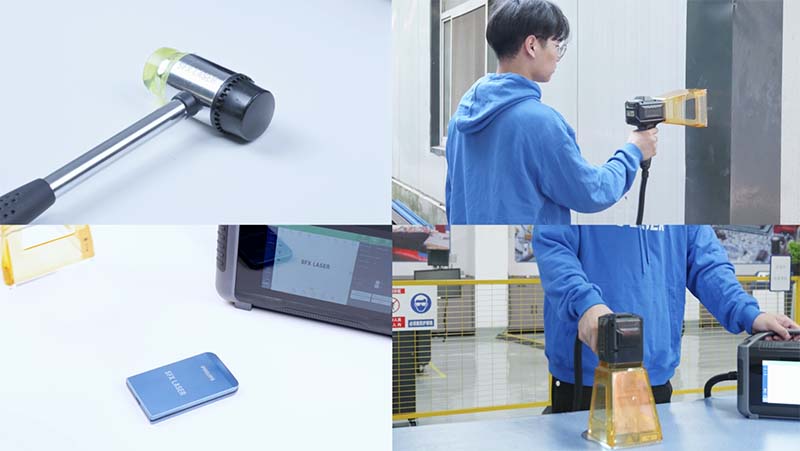
Dapeng Automated Laser Marking Systems
Automatic laser marking systems, including inline laser marking machines, multi-station laser marking machines, portable laser marking machines, flying laser marking machines, and vision positioning laser marking machines, are designed to quickly mark various materials. These machines leverage automation to enhance production efficiency, meeting the demands for large-volume production, high precision, and flexible applications.
In conclusion, achieving high quality laser marking goes beyond selecting the right machine—it involves understanding the underlying principles, mastering the variables that influence marking precision, and fine-tuning settings based on the material and desired result. By adjusting parameters such as power, speed, and focus, and experimenting with different settings, you can significantly improve the clarity, depth, and durability of your marks. If you have any questions about laser marking equipment or need assistance with settings, feel free to reach out—we’re here to help you achieve the best results.