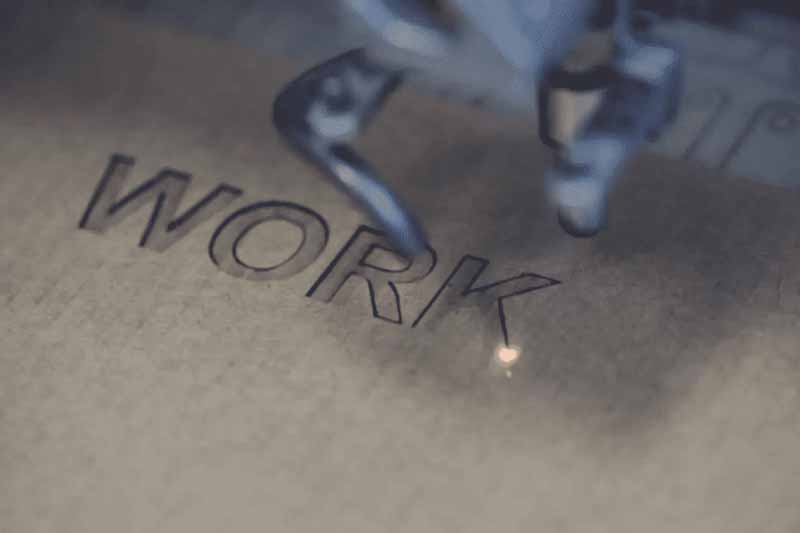
The high speed laser marking machine plays a crucial role in achieving both precision and productivity. Designed for rapid, continuous operation, these machines deliver clean, permanent markings on a wide range of materials including metals, plastics, ceramics, and more. Whether you’re marking serial numbers, QR codes, logos, or production dates, a high speed laser system ensures minimal downtime and consistent quality—making it an essential tool for mass production and industrial automation. This article will take you to explore what laser marking speed is.
What is Laser Marking Speed?
Laser marking speed refers to how quickly the laser beam moves as it creates the desired pattern by melting the surface layer of the material. The laser moves horizontally along the X-axis and vertically along the Y-axis to trace the design. When a material is placed on the laser machine’s worktable, the marking speed setting determines how fast the laser beam travels along each axis to process the material. This speed is typically measured in millimeters per second (mm/s).
The marking speed affects how long the laser dwells on a given area, which in turn influences the depth, quality, and overall appearance of the mark. Faster laser marking speeds result in shorter processing times. However, marking efficiency is influenced by several factors, mainly in two areas: (1) the type of material, and (2) the marker’s parameters, such as the scan lens, galvanometer, laser power, and delay settings.
How Laser Marking Speed Affects Marking Depth
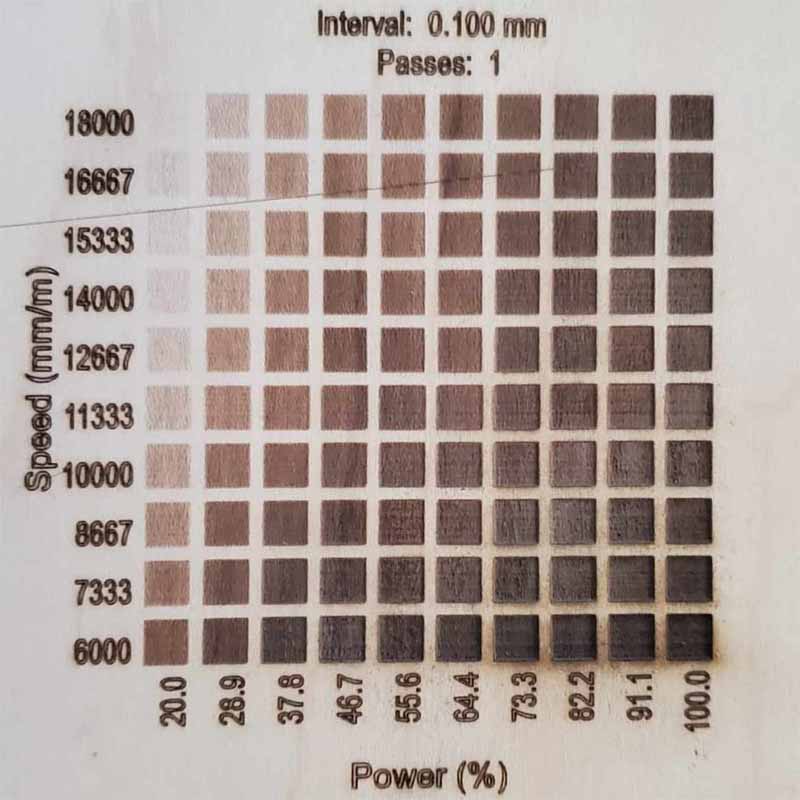
When the laser operates at a lower speed, it stays longer on the material, concentrating more energy on a specific area. This results in deeper marks with higher contrast, making it ideal for deep engraving or high-precision applications.
In contrast, high-speed marking involves shorter exposure times and lower energy per pass, producing shallower and softer marks. This approach is well-suited for light etching or surface marking. In cases where a specific depth is required—such as exceeding 0.005 inches—performing multiple passes at high speed can sometimes be more efficient than a single pass at low speed.
How to Increase Laser Marking Speed?
In industrial applications, increasing laser marking speed not only enhances production efficiency but also helps reduce per-unit manufacturing costs. Here are several key factors to improve marking speed:
1.Increase Laser Power
Laser power is one of the most critical factors affecting marking speed. Generally, the output power is doubled, and the laser marking speed is almost doubled. However, when the marking speed is increased, the laser delivers less energy per unit of time, which may result in unclear markings. To maintain marking quality, laser power should be increased accordingly.
Fiber lasers typically use a percentage-based power control. To extend the laser’s service life, it’s recommended to keep power settings below 80% of the rated maximum.
2. Use a High-Speed Galvanometer
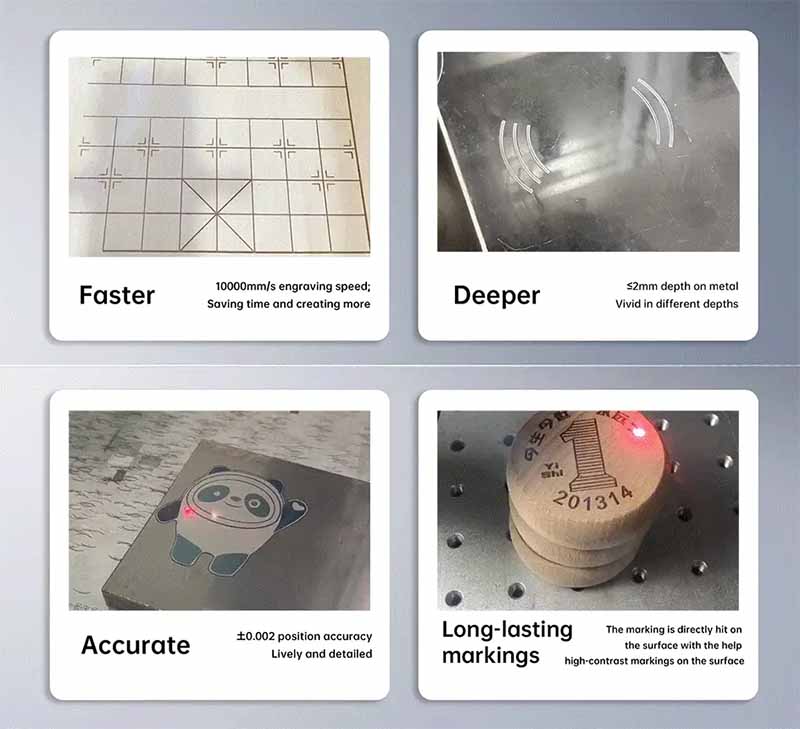
The galvanometer controls the movement of the laser beam and has a direct impact on both marking speed and quality. Standard galvanometers can reach scanning speeds of up to 3,000 mm/s, while high-speed models can achieve up to 10,000 mm/s. This significantly improves throughput and reduces image distortion, making them ideal for speed-critical marking tasks.
3. Optimize Marking Density
Marking density refers to the spacing between laser scan lines. Higher density means more scan lines and slower speed. This can be adjusted through the “fill spacing” or “hatch spacing” parameter in your marking software. Finding the right balance between speed and clarity is key to efficient operation.
4. Limit Marking Field Size
Larger marking fields require greater deflection angles from the galvanometer, which can reduce marking efficiency. Additionally, lenses designed for large marking areas have longer focal lengths, which lower the energy density of the laser spot. To maintain quality at larger sizes, the marking speed must often be reduced. Therefore, it’s advisable to use the smallest field size that meets your part dimensions to maximize speed and energy efficiency.
5. Manage Marking Depth
Deeper marks require more laser energy, which naturally slows down the process. While increasing laser power, current, or performing multiple passes can help achieve greater depth, these methods typically come at the cost of marking speed. Efficient depth control is crucial to balancing speed and quality.
Types of Laser Marking Methods
Laser marking can be achieved through a variety of processing techniques, each requiring different parameter settings and optical configurations. These methods are suited to a wide range of application scenarios:
- Laser Etching
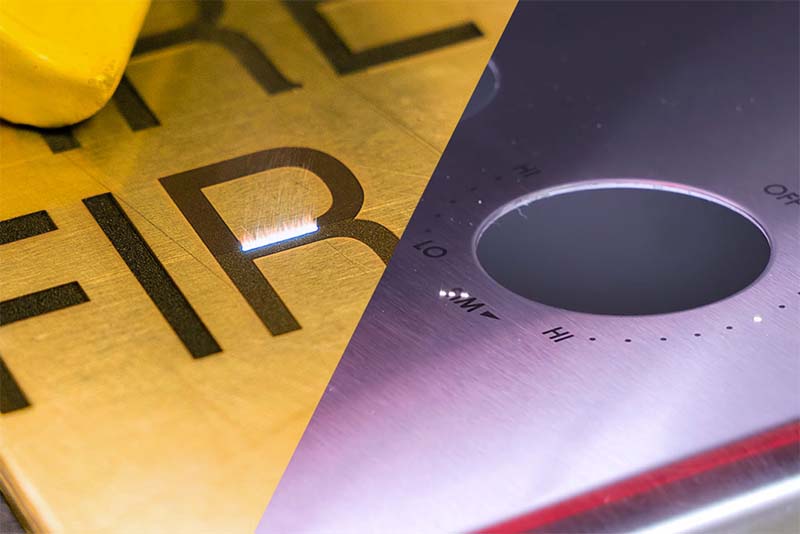
Laser etching is an ultra-fast marking process in which localized heating causes the material surface to expand or slightly melt, creating a permanent mark. This method does not remove material, making it more efficient and ideal for high-speed, high-volume production environments. Since it consumes less energy, it requires lower laser power, making it a cost-effective option overall.
- Laser Engraving
Laser engraving removes material from the surface using a high-energy laser beam to create recessed marks with measurable depth. Compared to etching, engraved marks are more durable and resistant to wear, making this method ideal for applications that demand high marking permanence. However, because material is physically removed, engraving requires more time and energy, as well as higher power and stability from the laser system—resulting in greater equipment costs.
- Laser Annealing
Laser annealing is a non-destructive marking process, primarily used for ferrous metals such as stainless steel and titanium alloys. The process involves slow heating of the surface, allowing oxygen to diffuse into the material and alter its color, resulting in a visible mark. Since no material is removed or surface structure damaged, laser annealing is especially suitable for applications where maintaining material integrity is critical—such as in medical devices or precision electronic components.
Laser Marking Speed and Power Settings
- Power Setting: For metals (stainless steel/aluminum alloy), recommend 60%-90%; for non-metals (plastic/wood), maintain at 30%-50%.
- Special Case: Titanium blackening requires 80% power + 500mm/s speed + 0.01mm line spacing.
- Speed Optimization: For general materials, 200-800mm/s; for highly reflective aluminum, up to 1200mm/s (with +5% power adjustment); for precision QR codes, ≤300mm/s.
- Frequency Matching: Fiber lasers can be dynamically adjusted between 20-80kHz.
High Frequency (50-80kHz) is suitable for micron-level marking on electronic components;
Low Frequency (20-30kHz) is used for deep engraving on automotive parts.
How to Set the Speed of the Laser Marking Machine?
Parameter Settings for Laser Marking on Wood
Applying a laser marking machine on wood requires specific parameter settings to ensure the best marking quality.
Choose the Appropriate Laser Type: Different lasers suit different materials. For wood marking, a CO2 laser marking machine is recommended because its longer wavelength is better absorbed by wood, producing superior marking results.
- Laser Power: Laser power is a key factor affecting marking depth and quality. For natural-colored wood, a laser power of around 500W is suggested. For colored or dark wood, due to stronger laser absorption, the power can be reduced to about 80W.
- Marking Speed: The speed should balance the wood type and required marking precision. Generally, natural-colored wood can be marked at about 1500mm/s, while colored or dark wood should be marked slower, around 1000mm/s.
- Frequency: Frequency settings mainly affect the fineness and clarity of the marking. For natural-colored wood, a frequency of about 30kHz is recommended; for colored or dark wood, the frequency can be lowered to around 20kHz.
Power and Speed Settings for Metal Laser Marking Machines
- Take aluminum as an example in metals, using a 20W fiber laser marking machine. To achieve good results, set parameters as follows: speed 1200mm/s, power 60W, frequency 20Hz.
- Next, take PVC in plastics as an example, using a 10W CO2 laser marking machine. For good marking results, set parameters as: speed 1500mm/s, power 35W, frequency 8Hz.
The above parameters are for reference only. Specific settings should be adjusted according to the actual laser marking machine model and the characteristics of the wood.
Laser Marking Parameters and Material Testing Guide
Before starting laser marking, it is essential to test the material. Especially when the material is expensive, has a special shape, or is available in limited quantities, testing on scrap material can prevent unnecessary loss. Even with extensive experience, when dealing with unfamiliar or uneven surfaces, testing should be prioritized to ensure marking quality.
- Differences in Parameters for Different Materials
Materials effects very differently to laser marking, requiring varying power and speed settings. Even among similar materials, significant differences may exist. For example, cowhide is tough and can tolerate higher power, whereas lambskin is softer and using the same parameters may cause burning or blurry marks. Therefore, parameters should be reset each time the material type changes.
- Adjusting Speed and Power
If test results are unsatisfactory, adjust the laser speed or power accordingly and retest. Smooth edges indicate proper settings, while rough or burnt edges may require lowering speed or increasing power.
- Impact of Material Condition
Material pretreatment also affects laser marking results. Wood, for example, can easily burn if not sanded or cleaned. Basic preparation before engraving is recommended to achieve better results.
Mastering the right laser marking speed and power settings is essential to achieving optimal results across different materials and applications. Properly balancing these parameters ensures clear, precise markings without damaging the substrate, while maximizing efficiency and reducing production time.